Contents
How to track Lightsail cost by project
If you have several projects with different resources all in one AWS account, how do you track costs for each project?
The answer is Cost Allocation Tags.
A tag is a label with a key and value that can be attached to many (but not all) resources in AWS. You can then generate cost reports with charges grouped by tag.
For example, to see costs per project, you could create a tag called “project” with values like “project A”, “project B”.
Creating cost allocation tags
Once logged in to the AWS console, choose Tag Editor under the Resource Groups menu. We now have to find the resources you want to tag.
If your AWS project is a Lightsail WordPress project then you are probably using these resources:
- Lightsail
- Route 53
- S3
- Cloudfront
If you have also set up email forwarding for your domain then you will be using Simple Email Service and Lambda.
You won’t find SES in the Tag Editor. You can only view SES costs in the standard billing console. Remember that the first 1000 received emails are free anyway.
Lambda also has a free tier of 1 million requests per month so if you are only using it for email forwarding you may well not have any charges.
You won’t find Lightsail in the Tag Editor. We’ll do that later.
- Choose your regions, select the resource types you care about and click search
- In the list of matching resources you can click an ID to open it in a new tab and work out what it is
- Go through the list and check all the resources for your first project
- Click Manage tags of selected resources
- Enter a tag key and value and apply it to the selected resources, eg key=project, value=my-first-project
Repeat those steps for your other projects.
The tags won’t show up in the Cost Allocation Tags Manager (in the Billing Console) for 24 hours.

Tracking Lightsail cost with tags
We are most interested in Lightsail cost tracking. We have to do that in the Lightsail console.
In Lightsail, instances, databases, disks, DNS zones, and load balancers can all be tagged.
Lightsail snapshots inherit the tag of the instance.
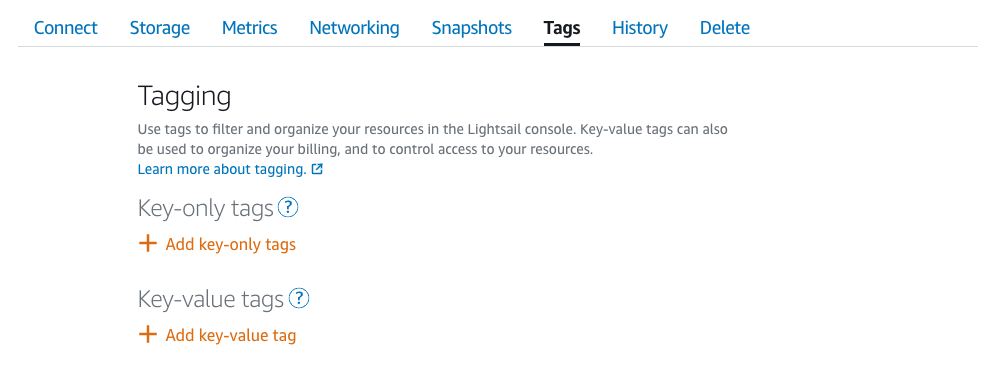
- Open the management page for the instance and choose the Tags tab
- Add a key value tag with the same key (eg project) used before, and suitable value (eg my-first-project)
- Click the green tick to apply it
Add tags to other instances for other projects.

Viewing Lightsail cost reports
Once the tags appear in the Cost Allocation Tags section of the Billing Console (takes 24 hours) we can use them in several ways.
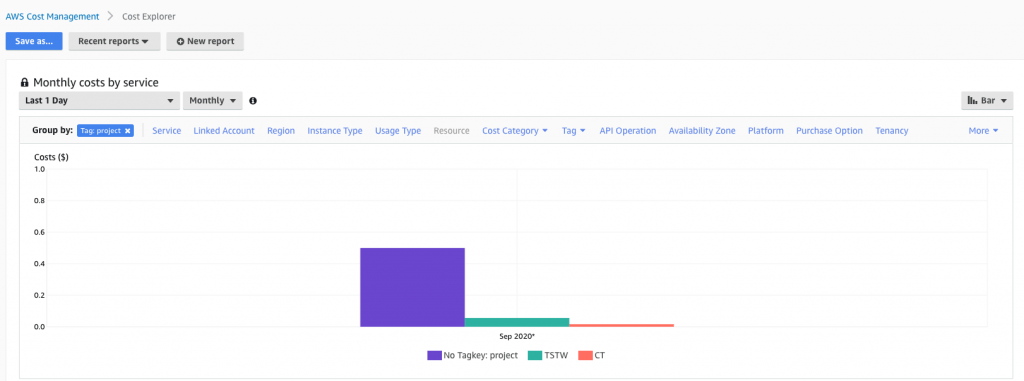
First choose the Cost Explorer, then open the Monthly spend by service view. You can then group costs by tag using the tag dropdown.
At first you’ll only have historic data with no tags attached. You’ll have to wait a while for the display to be meaningful. Here’s a shot that only shows a single day of data.

We can also create a monthly cost allocation report. Go to Billing Preferences in the Billing Console and expand Detailed Billing Reports [Legacy].
- Enable Turn on the legacy Detailed Billing Reports feature to receive ongoing reports of your AWS charges
- Configure an S3 bucket to receive the reports
- Check Cost allocation report
- Click Manage report tags
The page shows all your tags. Select the ones you want to include in the report and activate them.
PS You probably don’t want the “Detailed billing report with resources and tags”. The Cost allocation report will include your tags and shows monthly costs. The detailed one is hourly, and for one day you’ll get at least a MB of data. Don’t pay for S3 data you don’t need.
However, you will need that report if you want to see EC2 costs, and once you disable the hourly report there isn’t any way to get it back. If you know how to get it back, please tell me!
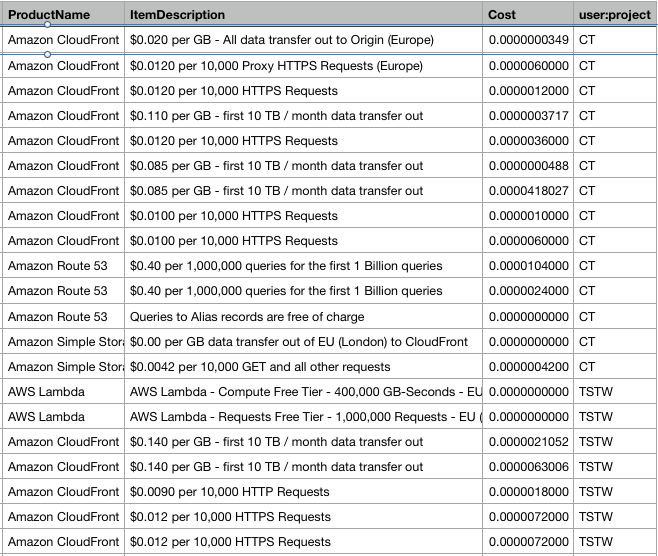
A CSV report is delivered to the S3 bucket with a full breakdown of costs grouped by tags. There is a lot of data in the CSV. The best solution is to put it in a spreadsheet. Sort by project, then by product name, or make a pivot table. All the info you need is in there, you just have to organise it.
Here’s an example. The right hand column is my “project” cost allocation tag, showing two different projects.

There is full documentation for Cost Allocation Tags and for using the Tag Editor and creating tags to track Lightsail cost.

